


TREATLIFE 4Pack Smart Alexa Plugs + 1Pack Smart Dimmer Plug Bundles
4Pack Smart Alexa Plugs + 1Pack Smart Dimmer Plug Bundles
Automate Timer: Create the customized schedule on APP to automatically turn on/off home appliances like fish tank, air conditioner, Christmas lights, coffee maker, fans, etc. Rating: 120V, 60Hz, 15A/1800W.
Grouping & Sharing: Create the Group in your APP, connect multiple plug in timers to one room, so you can turn everything on or off at once manually or via APP. Share your timer plug to family members as short as one minute.
Away Mode: Set the plug timer turn your stuff on or off randomly to make it look like you’re home even you’re not, to deter intruders, avoid property loss and ave costs on electricity.
Individual Outlet Control: The outdoor dimmer plug features 2 dimamble outlets, you can dim outdoor string lights, Patio lights and any other backyard dimmable lights separately or together at the same time. Max power : 600W (300W Max for each).
IP64 Waterproof & Long-range WiFi: IP64 rating helps to protect your string light dimmer against dust intrusion and splashes of water. The outdoor light dimmer provides more stable Wi-Fi connectivity with a longer coverage range of up to 300ft.
$50.99 $62.98


Price: $62.98 - $50.99
(as of Dec 29, 2024 05:15:21 UTC – Details)

4Pack Smart Alexa Plugs + 1Pack Smart Dimmer Plug Bundles
Automate Timer: Create the customized schedule on APP to automatically turn on/off home appliances like fish tank, air conditioner, Christmas lights, coffee maker, fans, etc. Rating: 120V, 60Hz, 15A/1800W.
Grouping & Sharing: Create the Group in your APP, connect multiple plug in timers to one room, so you can turn everything on or off at once manually or via APP. Share your timer plug to family members as short as one minute.
Away Mode: Set the plug timer turn your stuff on or off randomly to make it look like you’re home even you’re not, to deter intruders, avoid property loss and ave costs on electricity.
Individual Outlet Control: The outdoor dimmer plug features 2 dimamble outlets, you can dim outdoor string lights, Patio lights and any other backyard dimmable lights separately or together at the same time. Max power : 600W (300W Max for each).
IP64 Waterproof & Long-range WiFi: IP64 rating helps to protect your string light dimmer against dust intrusion and splashes of water. The outdoor light dimmer provides more stable Wi-Fi connectivity with a longer coverage range of up to 300ft.
Based on 1 review
Add a review
Related products
-
Wi-Fi Smart Plugs
Amazon Smart Plug | Works with Alexa | Simple setup, endless possibilities
Amazon Smart Plug works with Alexa to add voice control to any outlet.
Simple to set up and use—plug in, open the Alexa app, and get started in minutes.
Compatible with many lamps, fans, coffee makers, and other household devices with a physical on/off switch.
Compact design keeps your second outlet free for an additional smart plug.
No smart home hub required. Manage all your Amazon Smart Plugs through the Alexa app.
Set up Routines that automate everyday tasks like turning on a light or brewing coffee.
Reliable—automatically reconnects to Alexa after power/Wi-Fi outages.SKU: n/a -
Wi-Fi Smart Plugs
meross Smart Plug Mini, 15A & Reliable Wi-Fi, Support Apple HomeKit, Siri, Alexa, Echo, Google Assistant and Nest Hub, App Control, Timer, No Hub Needed, 2.4G WiFi Only, 2 pack
 Wi-Fi Smart Plugs
meross Smart Plug Mini, 15A & Reliable Wi-Fi, Support Apple HomeKit, Siri, Alexa, Echo, Google Assistant and Nest Hub, App Control, Timer, No Hub Needed, 2.4G WiFi Only, 2 pack
From the brand


Swipe to Learn More

At Meross, we create products that empower people’s lives. We believe in making homes smarter and people’s lives easier. We believe everyone deserves a smart life, and it should be simple, smart, and stable.
Smart Plugs Support Homekit
Smart Plug
Smart Switch Support Homekit
Outdoor Plugs Support Homekit
Smart Bulbs
Smart LED Strip Lights
Product Dimensions : 5.91 x 3.94 x 1.97 inches; 6.38 ounces
Item model number : MSS110HK
Date First Available : February 5, 2020
Manufacturer : meross
ASIN : B084JML1WNRemote Control: To enable HomeKit remote control, you need a HomePod, an Apple TV 4K, Apple TV HD, or an iPad. Set any of these Apple devices in your house as a HomeKit bridge and connect it to your home 2.4GHz Wi-Fi network. Keep in mind that once your HomeKit bridge is set up, it has to be kept online. If it is powered off or disconnected from the Wi-Fi, it will fail to respond when you intend to control the device remotely.
Voice Control: You can control your devices hands free, just give voice commands to turn on/off the connected devices. Compatible with Apple HomeKit, Apple Watch, Siri, Carplay, Amazon Alexa, Google Assistant.
Compact Size: Smart plug occupies only one socket, the device allows you to stack two mini smart plugs in the same outlet, which is convenient and practical.
Schedule: You can schedule connected home devices to turn on and off automatically by smart plugs. Save energy when lights are not needed or left on by accident. Sunrise and sunset setting are supported.
Quality: The mini plug is made of PC flame retardant material, and has been approved for safety and quality assurance. Certified by ETL and FCC, it supports home appliance up to 15A.SKU: n/a -
Wi-Fi Smart Plugs
TREATLIFE 4 Pack Smart Plugs Works with Alexa and Google Home, 7 Day Heavy Duty Programmable Timer, 1800W 15A WiFi Smart Outlet, Child Lock, Vacation Mode, Reliable WiFi Connection
 Wi-Fi Smart Plugs
TREATLIFE 4 Pack Smart Plugs Works with Alexa and Google Home, 7 Day Heavy Duty Programmable Timer, 1800W 15A WiFi Smart Outlet, Child Lock, Vacation Mode, Reliable WiFi Connection
From the brand


Why Treatlife?
Our goal is to make little changes through technology in people’s lives and make them easier and happier.
From smart lights, dimmer switches, plugs, and smart home sensors to any products that may follow, we will allow you to interact directly with your home easily and naturally, just as simple as tapping a switch.
New Release

Smart Plug
Smart Home Automation

Product Dimensions : 2.76 x 3.15 x 2.76 inches; 10.58 ounces
Item model number : SK50
Date First Available : May 16, 2020
Manufacturer : TREATLIFE
ASIN : B088PNCJFQ
Country of Origin : ChinaNote: Please be sure to download Treatlife APP, and then connect the Treatlife APP account to Alexa through ‘Skills and Game’. You cannot directly connect the smart plug to Alexa through ‘Add device’ on the Alexa APP. 2.4GHz WiFi is required. Rating: 120V, 60Hz, 15A/1800W
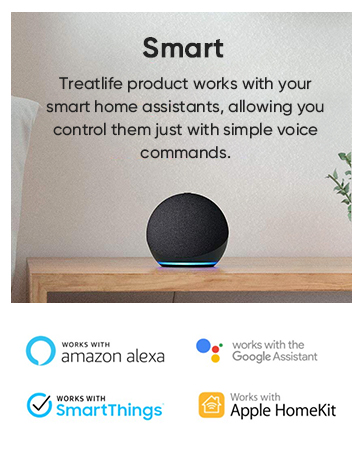
Voice Control: Treatlife electric outlet timer works with Alexa and Google Assistant, is simple to set up and use, plugin, and pair to Alexa, and gives a simple voice command to control your home devices. “Alexa, turn on the Christmas tree light now” “Okay”
APP Remote Control: Control your home devices from anywhere. Even if you’re not at home, you can control your timer outlet via APP directly, to avoid high energy bills and fire-hazards. You can also set the Child Lock, to prevent children from operating the timer plug outlet by mistake
Group Control and Devices Share: Create the Group in your APP, and connect multiple plug-in timers to one room, so you can turn everything on or off at once manually or via the APP. Share your timer plug with family members as short as one minute
Smart Away Mode: Set the plug timer to turn your devices on or off randomly to make it look like you’re home even if you’re not, to deter intruders, avoid property loss, and save costs on electricitySKU: n/a -
Wi-Fi Smart Plugs
Lutron Caseta Smart Lighting Lamp Dimmer for 100W Lamp Light Bulbs, Works w/ Alexa, Apple Homekit, Google Home (Hub Required), PD-3PCL-WH, White
, PD-3PCL-WH, White") Wi-Fi Smart Plugs
Wi-Fi Smart PlugsLutron Caseta Smart Lighting Lamp Dimmer for 100W Lamp Light Bulbs, Works w/ Alexa, Apple Homekit, Google Home (Hub Required), PD-3PCL-WH, White
Conveniently create just the right light for reading, watching TV, or entertaining, with the Lutron Caseta plug-in lamp dimmer. The plug-in lamp dimmer simply plugs into a standard outlet and can be used with up to two lamps. Control the lights from anywhere in the room by using the Pico remote control (sold separately). Using a Pico remote control and wallmount bracket (both sold separately), you can add a new “switch” to almost any wall surface where there wasn’t one before, without cutting holes or pulling wires. This dimmer works with up to 300-Watt of incandescent or halogen, 100-Watt of dimmable LED or dimmable CFL.
Is Discontinued By Manufacturer : No
Product Dimensions : 2 x 3.38 x 5.5 inches; 0.64 ounces
Item model number : PD-3PCL-WH
Date First Available : May 22, 2014
Manufacturer : Lutron
ASIN : B00KHSXB60
Country of Origin : ChinaINCLUDES: (1) Caseta Plug-In Lamp Dimmer; coordinating accessories sold separately
PEACE OF MIND: Set lights to automatically adjust with seasons so your family always comes back to a well-lit home; enable smart away to randomly turn your lights on/off to look like you’re home even if you’re away (Caseta Smart Hub, L-BDG2-WH, required)
MOST CONNECTED: Caseta connects with more leading smart home devices – including Amazon Alexa, Apple Home, the Google Assistant, Ring, Serena shades and Sonos – than any other smart lighting control brand (Caseta Smart Hub required)
CONTROL YOUR WAY: Caseta puts the smarts in the switch so you can control your lights a variety of ways – via the free Lutron app, with your voice, or from the wall. Create schedules in the app or activate scenes with a button (Caseta Smart Hub required)
GET MORE, SPEND LESS: One Caseta smart switch can control many bulbs at once; make many bulbs smart, even your existing bulbs; get smart control of multiple styles of dimmable LED, incandescent and halogen bulbs
SMART CONTROL OF PLUG-IN LAMPS: Simply plugs into a standard outlet and can be used with up to 2 floor or table lamps
WIRELESS REMOTE CONTROL: For added convenience, use with wireless Pico remote (PJ2-3BRL-GXX-L01) to turn your lights on, off, or dim and brighten with the touch of a button from anywhere in the home
EASY 3-WAY SETUP: Create a 3-way by mounting Pico to almost any wall surface – no cutting holes or pulling wire, with a wall mount bracket (PICO-WBX-ADAPT sold separately). Replace existing 3-way switches by mounting the bracket and Pico over the backbox
TECHNICAL DETAILS: Works with up to 100-Watt of dimmable LED light bulbs/CFL light bulbs or 300-Watt incandescent/halogen bulbs; not rated for low voltage applications (i.e. track or landscape lighting)
RELATED PRODUCTS: For outdoor on/off control of 15A lighting or 1/4 HP small motors, please see the Caseta Outdoor Smart Plug, PD-15OUT-BLSKU: n/a

P.Borrelli –
Can be flashed with open source firmware.
I specifically get both of these because I can erase the original firmware and install Open Source firmware that I trust and won’t send my information to mysterious servers in China.I use these individual plugs all the time, it’s easy to cut open the back to solder to the joints and install OpenBeken. They did just change the module on these from a WB3S to a WB2S and I permanently bricked some of these without realizing the change. Be sure to look at what you get if you intend to flash other firmware. It’s easy to look up the FCC listing and see photos of the internals to see which version you have. I recommended NOT fully disassembling the plugs as they are plastic welded together, and if you pull them completely apart it will be nearly impossible to get to stay together by themselves again.As for the outdoor dimmer, it’s easy to unscrew, causing no damage. I can’t remember if the onboard module can take OpenBeken, but I desolder the installed module and install ESP modules that I have flashed Tasmota on. I’ve done this with a dual out door non-dimming plug, and now this dimmer. If you desolder like I did, be careful as I accidentally pulled up some of the traces from the board. I definitely wasn’t winning with my soldering and flashing skills on this set, but if you are careful you can do it.
P.Borrelli –